Open Broadcaster is a great open-source recording tool that is primarily used for streaming. However, it can also be re-purposed as an excellent, high-quality game recorder. Use the tabs below to quickly the best game recording settings for Open Broadcaster. Refer to our video guide on how to record your desktop with Open Broadcaster.
The Best Open Broadcaster Recording Settings
This tutorial focuses on modifying the video, audio, and encoding settings to produce the best video output without impacting game performance.
That being said, there are minimum hardware requirements you should have when playing/recording resource intensive games in 2017:
- 8gb ram
- i7 CPU
- Game boots on SSD
- Recorded footage stored on a SSD or HDD (SSD is preferred)
- GTX 660
At a bare minimum, I highly recommend upgrading to an SSD if you are still running your game off of a standard hard drive. 500gb SSDs are incredibly affordable in 2017, so you could also use one to store your game footage. Solid state drives offer a fast read/write speed which is essential for recording and playing games. A faster read/write speed means that your game boots up quicker and you’ll load into the map quicker than you would have on a standard hard drive. Encoding and writing files is also much faster compared to a normal hard drive.
In some cases on a standard HDD, recorded footage might appear laggy, broken, or have skipped frames. This is likely due to a problem writing the recorded footage to disk. You’ll eliminate the chances of this happening by using a SSD.
You should always record with two hard drives: one to run your game off of and the other to store the recorded footage.
Do not set your file output path to the same hard drive you run your game off of!
If you are close to these minimum requirements, you should still try these settings. Remember, OBS is free!
Enable recording mode and change the file extension
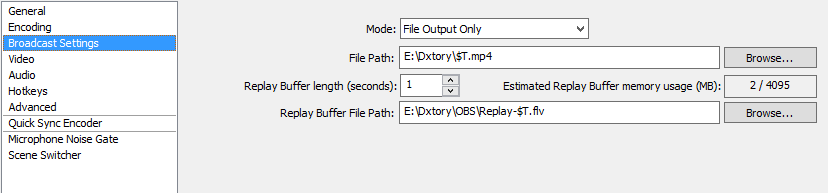 Found in Settings>Broadcast Settings
Two important things to note here. First, we need to set the mode to “File Output Only.” This re-purposes OBS from streaming the game to capturing and saving the footage. Next, we need to set the file path to an external hard drive. IMPORTANT NOTE: Change the file path from .flv to .mp4 like in the screenshot. FLV videos do not play nice in editing software and will have compatibility issues.
Encoding Settings
 Found in Settings>Encoding
A bit rate of 1000 is more than adequate for high-quality recording. We will set the quality balance to 10 and use a custom buffer size of 0. Change the audio codec to match your unique audio set up (my settings are fine as well).
Video Settings
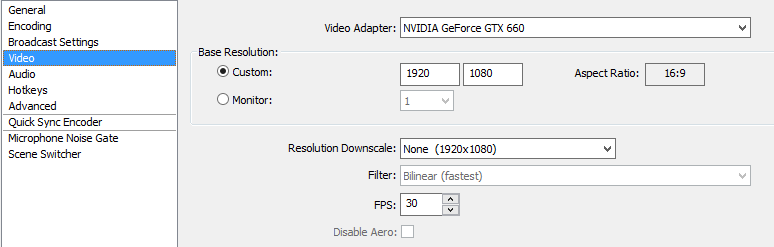 Found in Settings>Video
Adjust the resolution to fit your recording needs. If you have lower-end hardware, use the resolution downscale option to something like 1280×720. If you computer can handle it, record in 1080p. Set the FPS to 30. You can set it to 60, but this can cause lag and increase the file size.
Advanced Settings
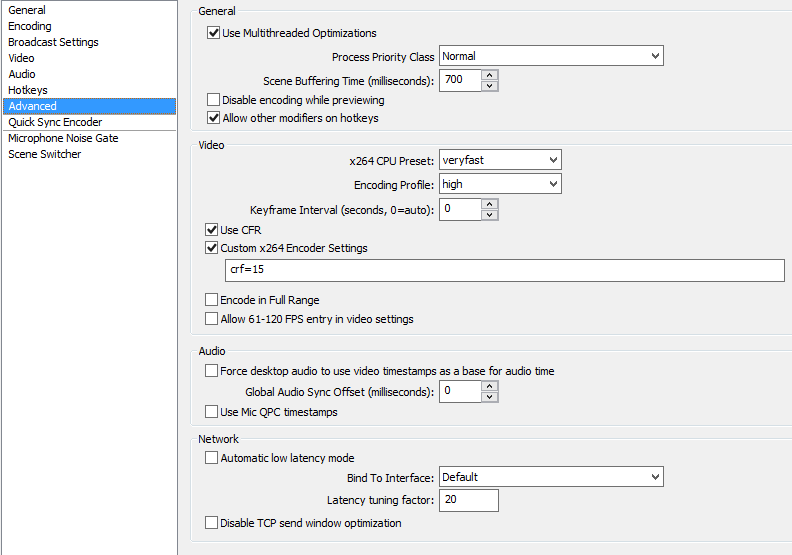 Found in Settings>Advanced
The settings here are pretty close to the default settings. However, we will set the scene buffering time to 700 milliseconds and check “Use CFR” and “Custom x264 Encoder Settings.” For this custom field, enter “crf=15.”
Audio Settings
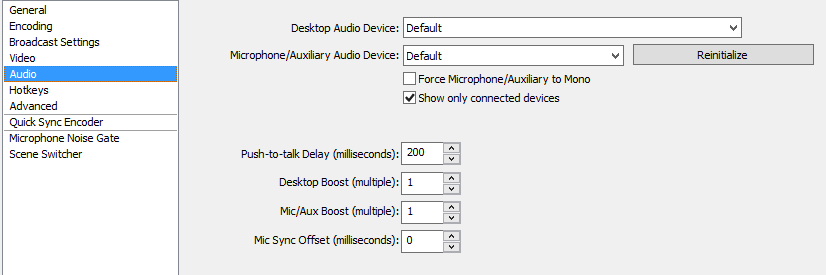 Found in Settings>Audio
The Audio settings can be left to default as OBS will automatically detect your audio devices. If not, use this section to designate your desktop audio source (your speakers or headphones) and your microphone.